
Webinar
Using OneOffice Webinar to host large meetings
Introduction
OneOffice Webinar is a very powerful video calling and sharing solution. You can easily host calls with 200 to 500 users. It includes such advanced features as a synchronized presentation, drawing board, screen sharing, breakout rooms, recording and live video sharing.
The chat of each call is temporary. If you want to keep it, you can download the chat digest before you end the call. If you want a permanent chat, you can use the chatting feature in Talk. Just note that it may become unmanageable if you have a large number of users.
Rooms & Settings

Similar to Talk, the Webinar application allows you to create permanent rooms with constant links you can easily share.
The settings icon all the way to the left allows you to customize each room based on your needs.

We recommend you go through the self-explanatory list. Among the most common settings:
- Custom welcome message
- Visibility settings - Public, invited, group etc.
- Adding moderators
- Allowing guests to start the call without a moderator present
- Allowing recordings
Sharing call link
A unique and permanent call link is generated for each room when it is created. Click on the clipboard icon on the left of the desired room to copy it to the clipboard. You can then send via email or chat
For public calls, non-registered users will get a promt when they connect to enter their full name
Starting call & Sound check
If you have appropriate rights to start the call, you can click on the play icon in the Webinars view, otherwise go straight to the link you copied in the step above. As new users join, you will hear a beep and see their avatar on the left side of the call window.
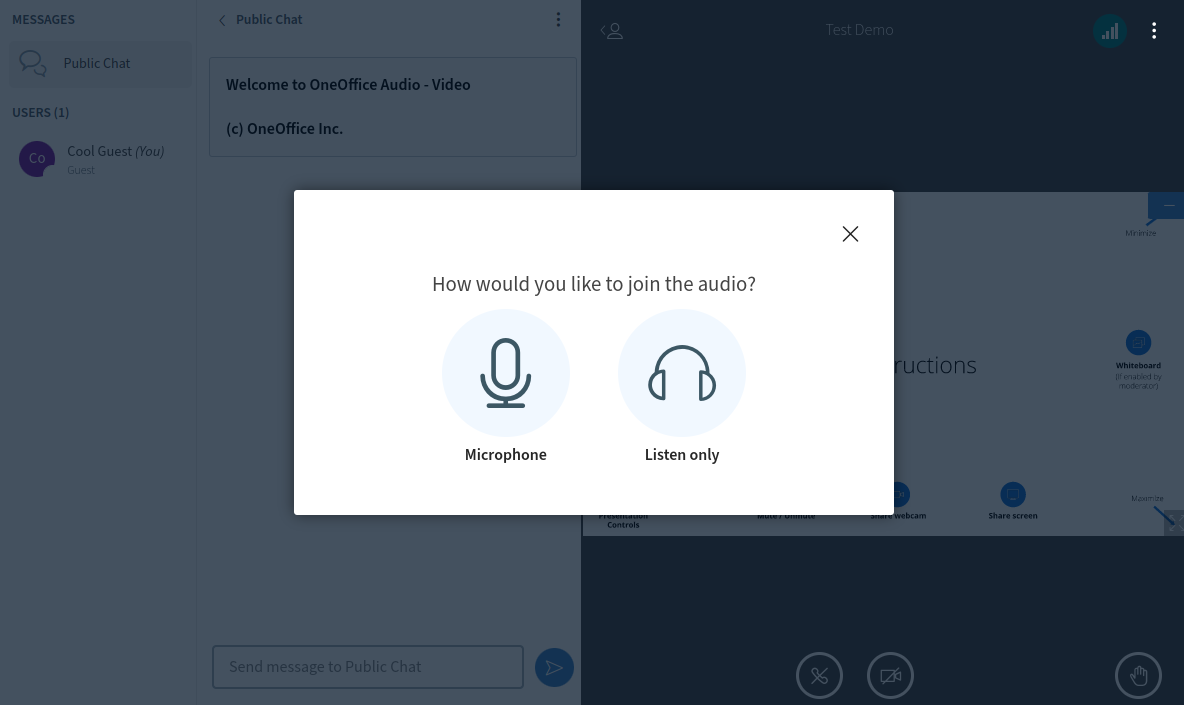
When you join a call for the first time, you are greeted with a popup to select your audio device followed by a sound check.
Make sure to click 'Accept' or 'Allow' when your browser prompts you for microphone access!
The sound check will ask you to speak in your microphone and play your message back to you. Don't worry, your audience will not hear your sound check and you won't disrupt the ongoing meeting.
This check helps users debug their sound setup on their own before joining the call. We recommend you don't disable this handy feature. Nothing is more annoying in a call than when someone joins and all attendees have to interrup to help them with their microphone or speakers -- The infamous "Can you hear me now?"
Interface
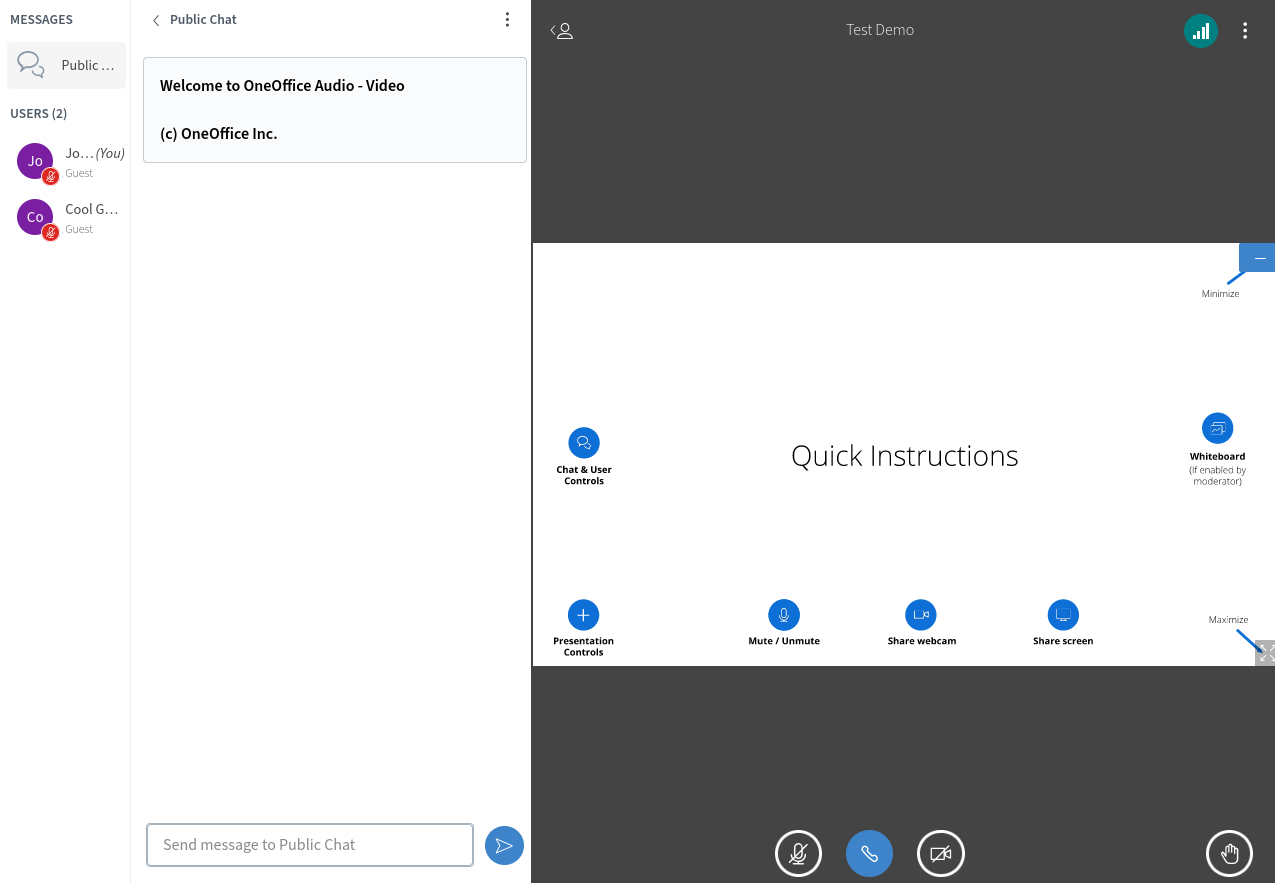
The typical view divided screen into three vertical sections
- Users on the left -- you can collapse by clicking on the user icon in the right-most panel
- Chats in the center -- you can collapse by clicking on the Public Chat header
- Call on the right -- this is the largest panel. You will see webcams, notifications, screen share, videos, etc. At the bottom of the Call panel you have your Call Controls (Mute, end the call, Webcam, Sharing screen and Raising your hand)
On the top right you have two small icons. The More menu allows you to show in fullscreen as well as customize settings. The Call Quality icon (which looks like volume levels) allows you to optimize your bandwidth (use it if you are getting spotty call quality)
In addition to collapsing the first two panels, you can also resize them at will. In fact, you can even move webcams around or resize them (say to focus on the main speaker).
Call Controls
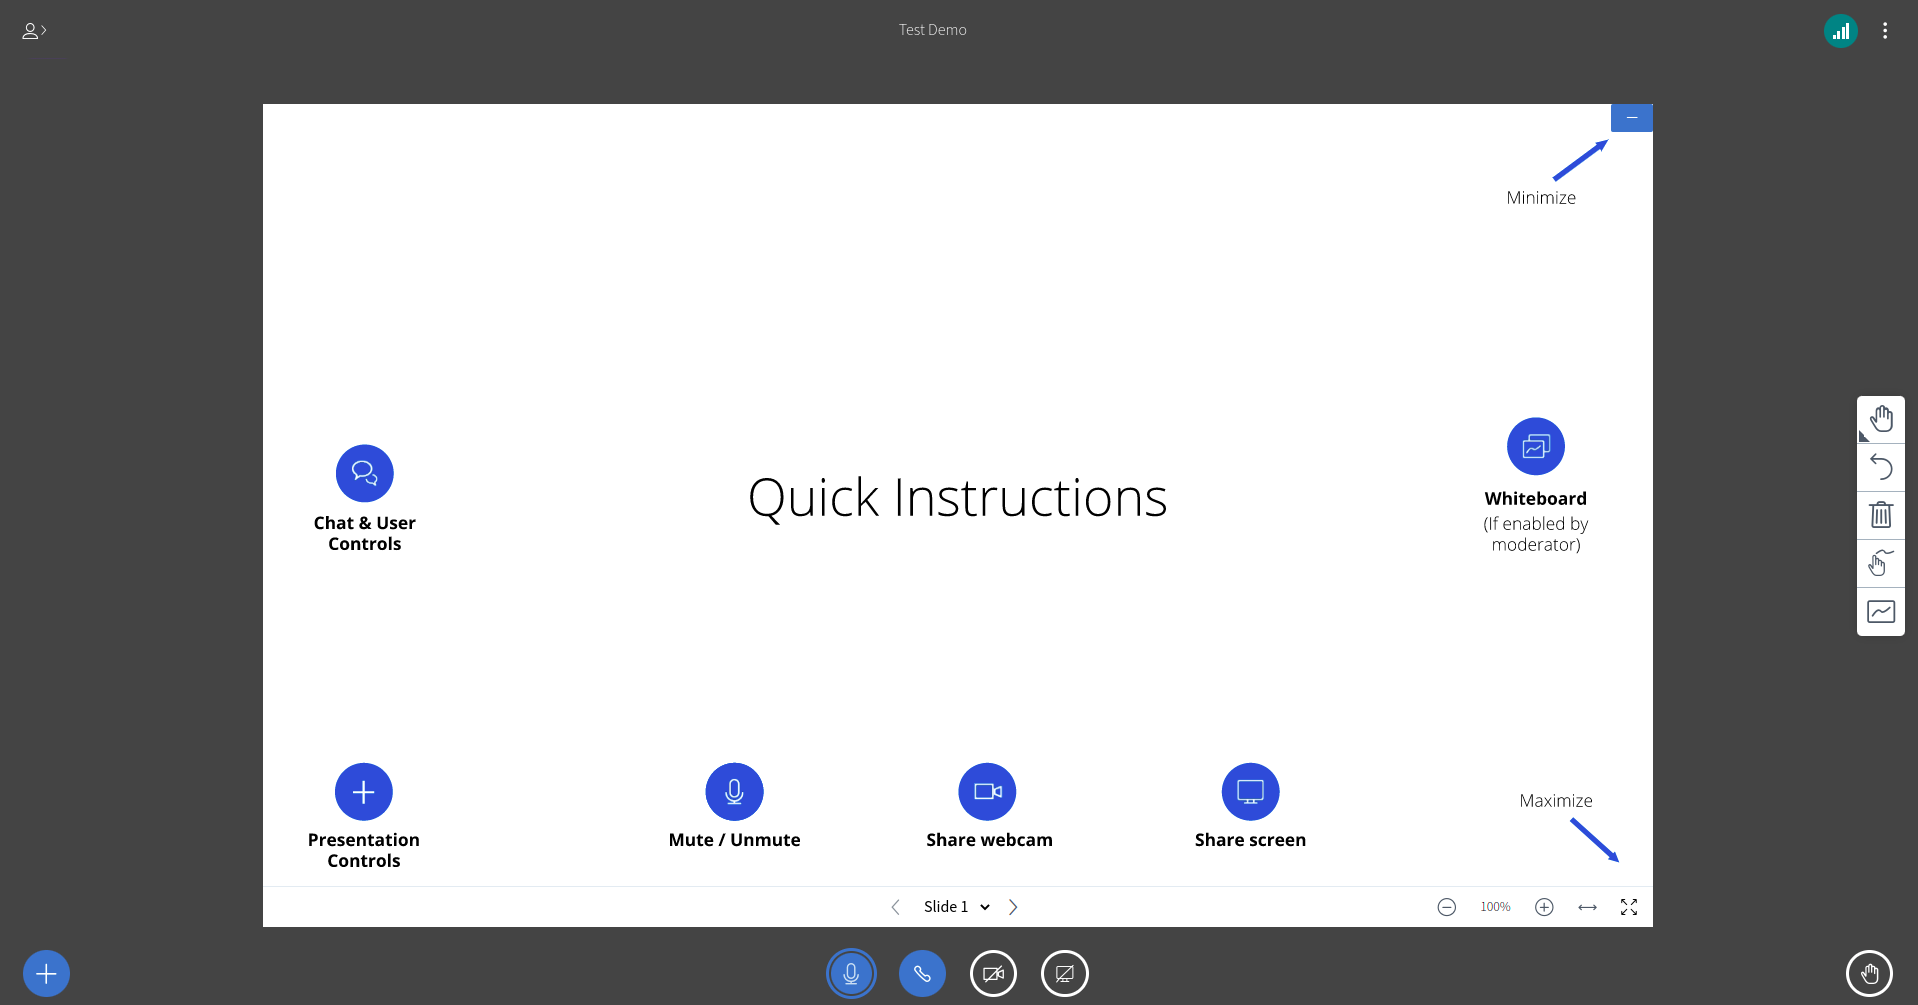
At the bottom of the Call panel you will see your call controls -- Muting, hanging up, enabling webcam etc.
Note that the + on the left is only for moderators, while the Share Screen icon is only shown for the current presenter (more about that below).
Interacting with Users
In the Users panel (all the way to the left), you can click on your avatar (usually the first one) to change your status (raise your hand, show emotions etc.).
If the moderator allowed it, you can click on any user to start a private chat. A moderator can also affect users, such mute or unmute them (very handy when users with a loud background can't hear you).
Moderator Controls
If you are a moderator or a presenter for the call you will see a Plus icon in the bottom of the Call panel which gives you additional controls.
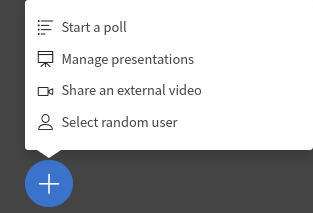
- You can start a poll
- Upload a presentation to share
- Share an external video
- Select a random user for interaction (so users don't think you are picking on them)
- Become presenter (not shown here, only applies if someone else is presenter and you to take control back -- see next section)
When you share an external video or upload a presentation your users will get synchronized automatically as you advance or go back. It is a much more pleasureable experience for your users than sharing your screen. Give it a spin!
Presenting / Sharing your Screen
Only a Presenter can share their screen. This is typically the first moderator that joins the call.
There can only be ONE presenter at any given time. When a new one takes over, the previous one loses presentation rights.
- Any moderator can take over and become presenter (by clicking on the +) and selecting Become presenter
- A moderator can select any user from the User list and click Make presenter
The Share your screen icon will magically appear on the bottom right of the bottom panel for the presenter. They can then click on it to start sharing their screen. The + icon will also appear on the left allowing them to share videos or presentation.