
Manual
Migrating your email to OneOffice
Introduction
This migration approach uses an online tool to copy the content of each email account over.
This approach is most suitable for smaller teams and when you are using a local email provider with no clear migration path
If you are migrating from Google Mail or Gmail, you need to first follow the steps in the section Preparing your Google Mail below.
Approach
This is where the fun begins.
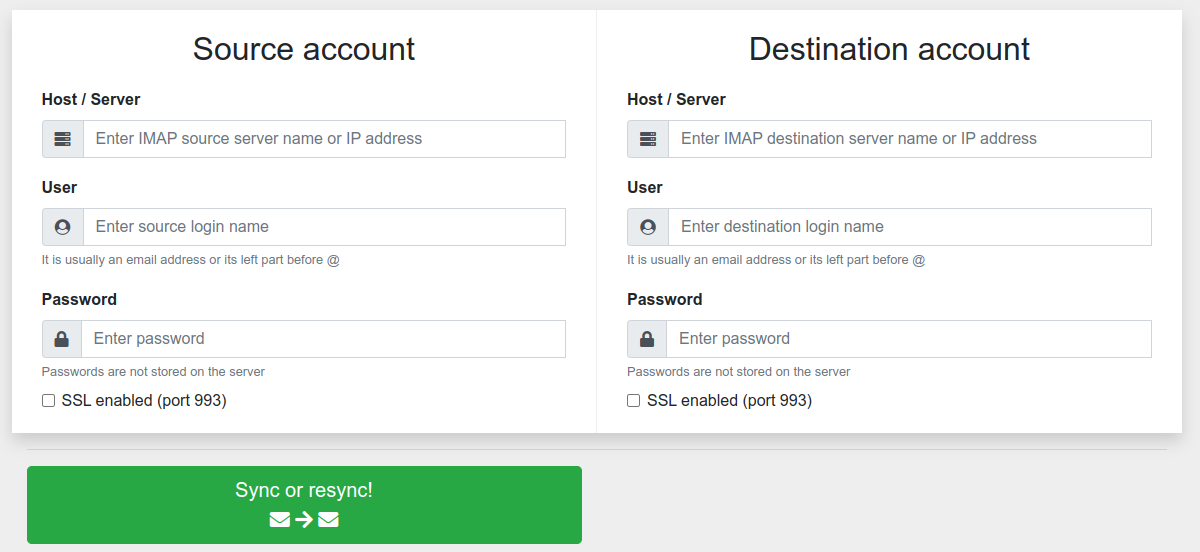
Your IT administrator will point you to our email migration tool (like this one)
- Enter your current email information on the left -- If you have an app password from Google, use it instead of your regular password (read below)
- Your OneOffice email information on the right (your IT manager will provide you the information you need)
Once you start the process, leave the page open in the background to ensure all emails are migrated.
If you have many mailboxes to migrate, please don't hesitate to reach out. We can run the migration email for hundreds of emails simultaneously. We will handle it during your deployment so that your team starts on the right foot.
Preparing your Google Mail
Google Mail won't just let us pull your emails. They have offloaded the security onto their users with complex tools to manage . Please follow the steps below to get your Google Mail account ready for migration.
Step 1 -- Enable IMAP on GMail
- Sign in to your Gmail/Google Workspace account using a supported browser.
- Click the gear icon located at the top right of the screen.
- In the drop-down menu that appears, click Settings.
- Switch to the Forwarding and POP/IMAP tab.
- Scroll down to the IMAP access, and make sure that Enable IMAP is selected.
- Scroll to the bottom. Click Save Changes.
Step 2 (optional) -- Turn on 2-step verification
- Sign in to your Gmail account
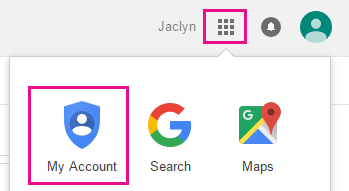
- Select Google apps > My Account
- On the My Account page choose Sign-in & security
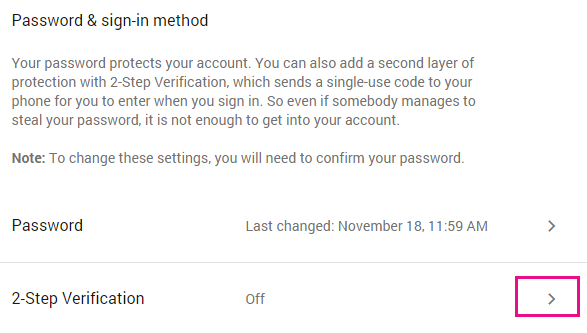
- Under the Password & sign-in method, choose the arrow next to the 2-Step verification, and provide your password if asked
- On the Signing in with 2-step verification page, choose Start setup
- Re-enter your password if asked, and in the Set up your phone step, enter or verify your cell phone. On the next step enter the verification number sent to your cell phone and choose Verify
- In the Trust this computer step choose Next, and in the Turn on 2-step verification step choose Confirm
Step 3 -- Get App password
- Sign in to your Gmail account
- Select Google apps > My Account.
- On the My Account page choose Sign-in & security.
- Under the Password & sign-in method, choose the arrow next to the App passwords, and provide your password if asked.
- On the App passwords page, in the Select app drop-down choose Other (custom name)
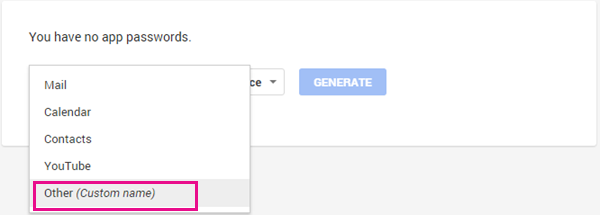
- Type in a name, for example Myconnection > GENERATE
- Note the app password under Your app password for your device
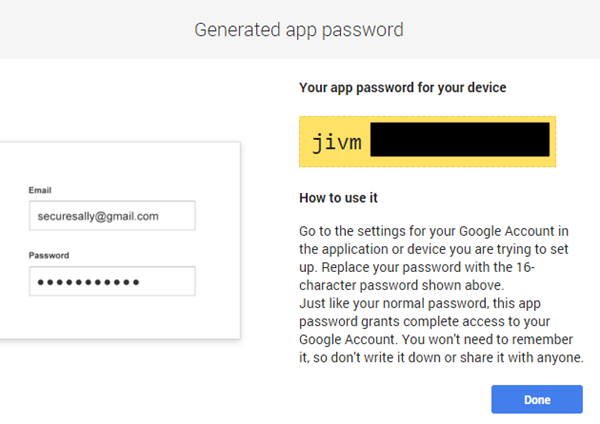
Use this App password instead of your regular password when migrating your email